How to Create a Custom Squarespace 404-Error Page
Table of Contents Show
Have you ever clicked on a link only to find a "Page Not Found" message? Whomp Whomp. It's so disappointing!
But honestly, it's bound to happen at some point to everyone.
Whether your visitors have a typo, you updated a URL and forgot to set a redirect, or any number of other reasons, 404 pages happen.
That's why designing a thoughtful 404 error page can turn a potential annoyance into a helpful detour for your website visitors. A custom 404 page for your Squarespace site keeps visitors on your site, and also enhances your brand's image.
Here's how to create a custom 404 error page on Squarespace that’s helpful for your visitors.
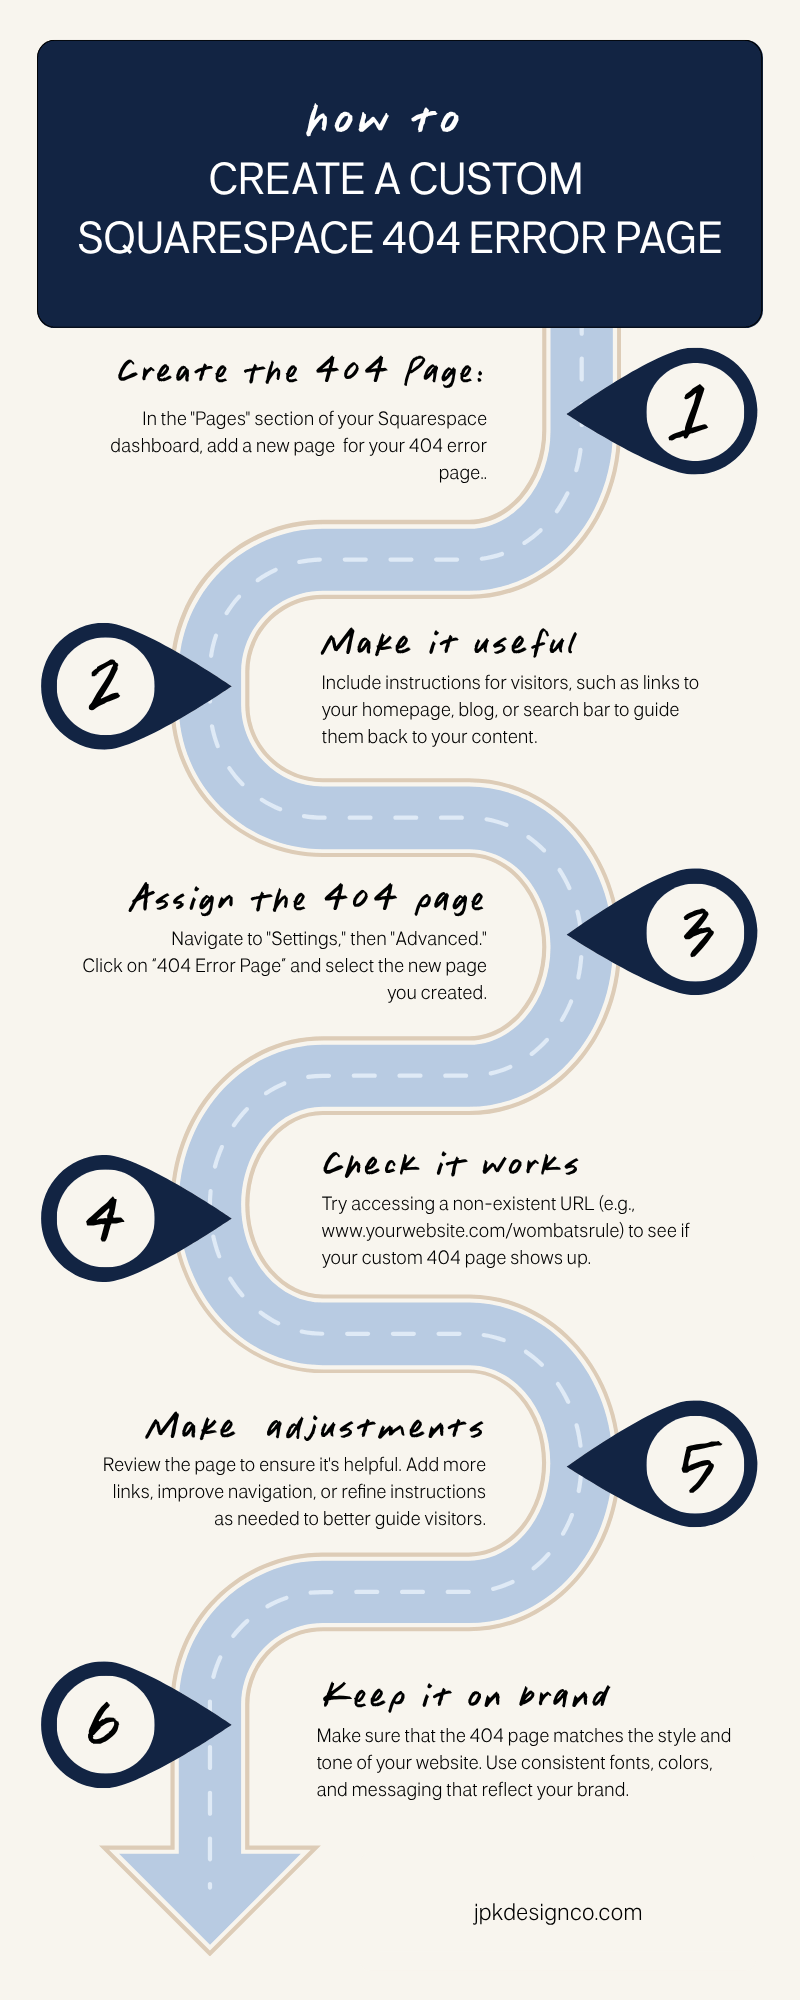
Create a Custom Page
01. Log into your Squarespace dashboard.
02. Go to the Unlinked "Pages" section on the left-hand side of the backend of your site.
03. Create a new page. This will serve as your *new* 404 error page.
04. Design this page to be helpful with links back to your homepage, popular products, recent blog posts, or a search bar. Include funny, cheeky, or on-brand text that informs your visitor that the page they’re looking for cannot be found, and guide them to other parts of your site that they may find useful.
👉 Stuck on what to include on your 404 Error Page? See 404 page tips and examples here.
Set the Custom 404 Page
Once your page is created and saved:
05. Navigate to "Settings" from your main menu.
06. Click on “Advanced” and then select “404 Error Page”.
07. From the dropdown menu, select the page you just created to set it as your new 404 error page.
08. Hit ‘save’ to confirm your choice.
I created a quick 1 minute video in a template of mine to demonstrate exactly how to create your custom Squarespace 404-Error Page ↓
Test Your 404 Page
After setting your custom 404 page, it’s important to test it to make sure it’s working correctly.
09. Try entering a URL on your domain that doesn’t exist (like www.yourwebsite.com/wombatsarerad) to see if your custom 404 page appears.
For more information and inspiration, read this blog post: Don't Let Your 404 Page Be a Missed Opportunity.
By creating a custom 404 page for your Squarespace site, you improve the user experience - and also reduce the bounce rate that often occurs when visitors land on default error pages. Plus, it's a chance to show a bit of your brand's personality and connect with your visitors.